How to Choose the Best Photography Equipment for Your Aesthetics Clinic
Before-and-After images are becoming a common marketing element for medical aesthetics clinic websites and online review profiles. Consumers are expecting high-quality images free of editing that offer honest and clear depictions of what each medical aesthetic physician, clinic, or treatment is capable of achieving. To ensure your aesthetics clinic doesn’t fall behind, now is time to invest in the best camera and photography equipment for better Before-and-After photos and overall business success.
Get started today with our rundown of the pros and cons of lighting options and cameras for medical aesthetic clinics to improve the quality of your Before-and-After image galleries.
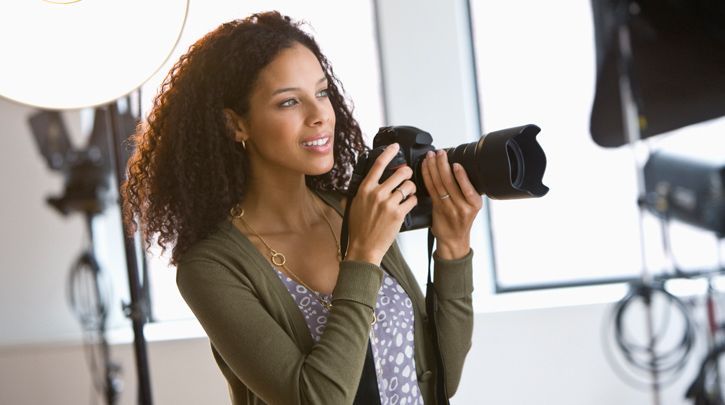
Choosing Your Camera
Choosing the right camera to purchase for your Before-and-After pictures can be a difficult task and a significant investment, making this one decision that shouldn’t be made lightly. The space you use to take Before-and-After images will be a factor, along with the camera’s capabilities. To help guide you through the options, here is a general overall of cameras:
- Mobile devices: Many of the newest mobile devices, such as tablets and smartphones, boast fairly advanced picture-taking capabilities these days. This, combined with the wide range of apps geared to medical aesthetics professionals to help make the most of each Before or After image ( including those used to help convert prospective patients into loyal clients ), make these devices a serious contender. However, they do have their limitations. Not all settings can be adjusted, meaning you will mostly be capturing images in what is essentially “auto” mode (i.e., the camera adjusts settings itself). As well, compatibility between mobile devices and office systems may be a challenge. As a side note, avoid using staff’s private phones or tablets, as this becomes a risk to patient privacy that shouldn’t be taken for the sake of saving a little bit of money.
- Point-and-Shoot Cameras: These cameras are the lowest cost option. Some point-and-shoot cameras will offer decent specifications and a few adjustable settings, but you may otherwise be stuck taking Before-and-After photos at whatever settings the camera deems appropriate, which could lead to issues with focus when attempting to capture results in closer detail or more difficult lighting, as well as consistency between Before photos and After photos.
- Dedicated medical imaging systems: These photography systems are created for clinical use. While they often carry a hefty price tag and require specific training, they can offer a good solution for businesses that cannot spare the space for a studio, as many of these devices may be moved from room to room. It should be noted that some are larger than others, so these systems may not afford the best option for clinics with cozier treatment rooms. They also often offer a built-in labeling and photo storage system, making it easier to keep your files in good order but requiring regular backups and software updates.
- Digital single-lens reflex (DSLR) cameras: DSLR cameras are considered the standard for quality in medical photography. While they require more training to operate, a DSLR camera allows the best control over picture quality with the user being able to select lenses as well as aperture, shutter speed, and exposure settings among others. A DSLR offering at least five megapixels and a minimum 105mm lens (no wide lenses, as they’ll distort results) offers a more than adequate setup that won’t become outdated for a few years. If you’re concerned about training costs, consider appointing two or three staff members to learn the device and run point on photo shoots. Your patient care coordinator may be one such candidate, as they will be well acquainted with each patient and are thus well suited to ease the concerns of patients who may be feeling uncomfortable in front of a camera.
Whatever camera you choose, it needs to be of good quality. Prospective patients are becoming ever more adept at spotting Photoshopped images, so taking the best picture possible and restricting editing to minor crops or lighting edits is essential.
Invest in Lighting
Shadows can wreak havoc on otherwise top-quality photos, emphasizing folds or wrinkles or causing the illusion of a larger waistline. To eliminate pesky shadows, consider investing in two quality monolights, one set on either side of the patient, or an external camera flash to adequately reduce shadows on and behind the patient. As a standard rule of thumb, have the patient stand approximately 24 to 36 inches away from any backdrop or wall to further prevent shadows.
Avoid relying on built-in flashes or natural lighting. Built-in flashes are often too harsh and even if the patient is fully clothed, taking photographs near a window to catch natural light can be uncomfortable for them and the lighting won’t always be flattering. Depending on the time of day and weather, natural lighting may lead to overexposure, yellow tones, or even blue tones on the skin and inconsistent lighting between pre-treatment and post-treatment pictures. All this means more editing is required and you run the risk of prospective patients questioning the validity of your edited images. Opt instead for the dedicated lighting setup—it’s worth the money.
Let’s Talk Budget
This isn’t an area to cut corners. Before-and-After images are an invaluable tool for your medical aesthetic clinic’s consultation process and marketing efforts. In fact, broken down by value per image, the overall setup will likely cost just pennies, so it’s best to invest the money today for business success tomorrow. Having said that, a realistic budget may be approximately $8,000–$13,000 for studio equipment , including hardware and software required to store and file images. Don’t forget that you’ll also want to invest in a cloud storage service or other secure storage solution for backing up your images outside of your network.
For more tips on how to improve your medical aesthetics business, contact a Venus Concept expert today to learn about the dedicated marketing support and practice enhancement programs we offer to our treatment providers.